Gentlemen,
There is another thread on this topic with some fine ideas and I thought I would add my project to the mix. Although the Husky has tons of storage it has precious little available to the pilot in flight, especially when he does not have a passenger on board to hand him requested items.
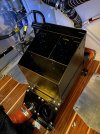
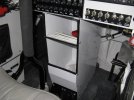
Mounting a compartmentalized storage box on top of the heater box makes a lot of sense but there’s a couple problems that need to be overcome. First, the box itself is extremely thin sheet steel that is riveted together. It gets the job done but would be easily damaged by mounting something on it incorrectly. Second, that box gets red hot and radiant heat would make anything mounted to it pretty damn hot as well. Not ideal to store a water bottle, candy bars, or possibly even electronic items that are affected by heat.
I wanted anything I mounted there to look like it might be a factory accessory so it needed to be made of aluminum and powder coated black.
I removed the heater box from the airplane so I could do all of my work on the kitchen table. A lot more comfortable than bent over headfirst into the aircraft.
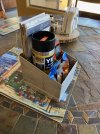
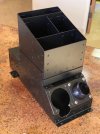
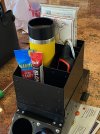
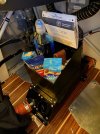
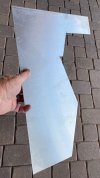
I first modeled what I wanted out of cardboard and positioned it with duct tape so I could actually try it in flight. After several modifications I came up with a design that would hold sectional maps in the back, a water bottle in the middle on the left, my handheld GPS communicator and other smaller items in the middle on the right, and a row in front for peanuts, protein bars, and other snacks.
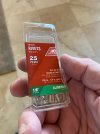
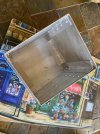
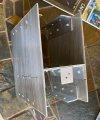
When I had exactly what I wanted I took it apart and laid all of the cardboard pieces on top of some thin aluminum sheet I bought at Ace Hardware to duplicate them in metal. Aluminum rivets and sections of 90° aluminum angle stock were used to assemble the box and partitions. I cut everything to size with a simple hacksaw and smoothed all the edges with a grinding wheel and coarse grit sandpaper.
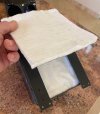
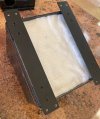
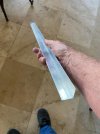
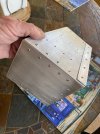
On the bottom of the box I used that same 90° angle aluminum stock to build a 1 inch tall air space. Only 4 one inch wide sections of that angle aluminum actually touch the mounting strips I cut to lay flat on the heater box (to make the mount stronger). This kept conducted heat to a minimum but radiant heat rising up from that heater still got my storage box pretty hot. So I filled that space with two 1/2 inch thick squares of the best ceramic fiber blanket insulation available (rated fireproof to 2400 degrees). That made a huge difference. Now when the heater box is red hot my storage box is barely warm.
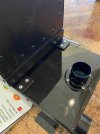
Satisfied with everything I removed it and had the assembly powder coated semi-gloss black. I should have made it gloss black like the heater box but it still looks fantastic and works even better.
Is this a solution for everyone who needs space for similar items? Probably not as the whole project took a lot of time and man hours. The solution is for Aviat to offer something like this as a factory option.
But until then if you enjoy working on such things the end result makes cross country flights a lot more enjoyable if you’re flying solo. After using it for a while now I can’t imagine flying without it. And perhaps my pictures will make it easier to duplicate for others. All the best!
Chip


Last edited:

